This engine buildup consists of a 2.4 liter bottom end and one of 2 different combinations of heads. The first would be a complete RSX-S head with intake manifold and throttle body or a TSX head with an RSX-S intake manifold and throttle body. There are 4 different chassis from which you can locate a bottom end as Honda releases more K24 engines this list may be updated.
Also if you are thinking about doing a K-Swap into an older Honda or Acura please check out our K-Swap guide HERE
K24A1
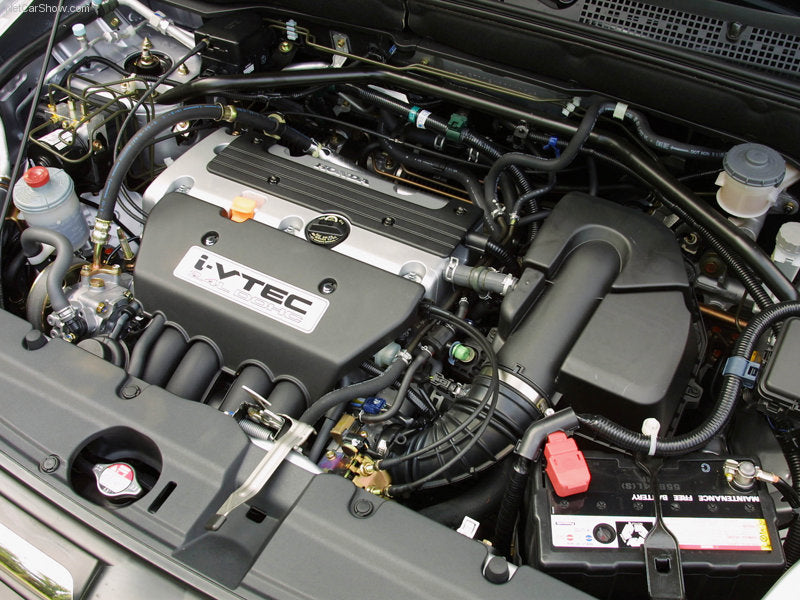
Honda CRV comes in with 9.6:1 compression and 2.4 liters of displacement. The motor is rated at 160hp at 6000rpm and 162lbs-ft at 3600 rpm. This motor does not use the conventional VTEC mechanism from the earlier B series motors but does have VTC. Instead it only has 2 cam lobes on the intake side and 1 on the exhaust lobe. This motor has no VTEC mechanism on the exhaust cam and runs on 12 valves before 2200rpm with the other 4 slightly opening. It also has smaller ports than the Type S and Type R. The motor also comes with a 5 speed transmission instead of the 6 speed and has no LSD.
K24A2
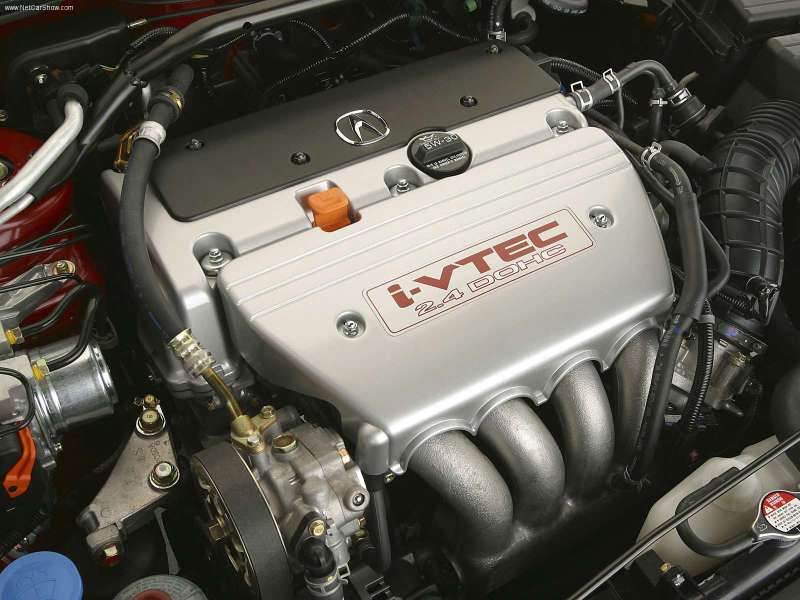
The Acura TSX comes in with 10.5:1 compression and 2.4 liters of displacement. The motor is rated at 200hp at 6800rpm and 166lbs-ft at 4500rpm. This motor uses the conventional VTEC mechanism as the older B series motors but with the addition of VTC. This motor uses a drive by wire throttle and has EGR castings on the manifold. This motor comes with a 6 speed transmission and no LSD.
K24A4
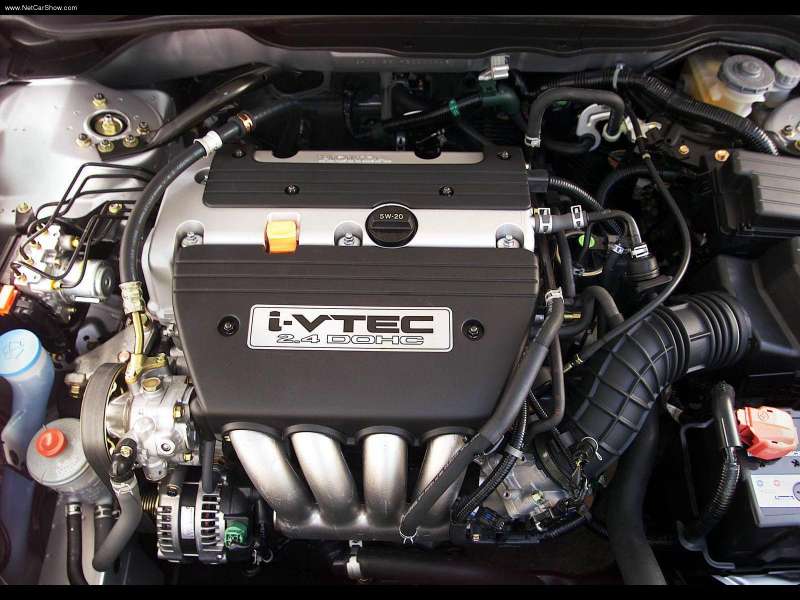
The Honda Element and Accord come in with 9.7:1 compression and 2.4 liters of displacement. The motor is rated at 160hp at 5500rpm and 161lbs-ft at 4500rpm. This motor does not use the conventional VTEC mechanism from the earlier B series motors but does have VTC. Instead it only has 2 cam lobes on the intake side and 1 on the exhaust lobe. This motor has no VTEC mechanism on the exhaust cam and runs on 12 valves before 2200rpm with the other 4 slightly opening. It also has smaller ports than the Type S and Type R. The motor also comes with a 5 speed transmission instead of the 6 speed and has no LSD. If using a K24a4 block the pistons will need to be swapped with aftermarket or a1, a2 pistons to avoid valve to piston contact.
K24A8
This engine is found in the (06-07) Honda Accord and (07-08) Honda Element. Is has the same 9.7:1 compression as the K24A4 and is rated at similar power. 166 hp @ 5800 rpm and 161lb trq @ 4000 rpm. Equipped with an electronic throttle body, this motor does not use the conventional VTEC mechanism but does have VTC. It only has 2 cam lobes on the intake side and 1 on the exhaust lobe. This motor also comes with an available 5 speed transmission and 5 speed auto. This engine shares the same downfalls with the K24A4 engines as the pistons will contact the K20 cylinder head.

K24Z1
This engine is found in the (07-09) Honda CR-V. It has the common 9.7:1 compression and is rated at 166 hp @ 5800 rpm and 161 lb·ft @ 4200 rpm with a red kline of 6500 rpm. This motor does not use the conventional VTEC mechanism found in the K20A but it does have VTC. This motor was only available with either a 5 speed automatic FWD gearbox or a 5 speed automatic AWD gearbox. This engine is different than the older “A” series engines in the sense that the oil filter has been relocated to the lower center portion of the block. This will interfere with a manual transmission using a traditional intermediate shaft. You must use a block off plate, an oil filter relocation kit (use all parts from the K24A series engine to place the oil filter to the upper position) you will also need to plug an oil port on the girdle as well as change to a K20A2 oil pump. It’s also worth mentioning that the timing chain cover is also slightly different than the “A” series engines and may not bolt up properly.

K24Z series oil block off plate

This is a picture of the oil port that must be capped off. It should be threaded, however, some reports say it is not. I cannot confirm.

First, make sure you have all the necessary parts to perform this engine build. There are many parts that are interchangeable from the K20 motor to the K24A series engine, however, there are differences.
USE THIS GUIDE FOR THE K24A SERIES ENGINES ONLY. THE Z SERIES ENGINES ARE NOT SUPPORTED.
A few parts are ARE interchangeable:
- Crank pulley (Some K24 blocks use a pulley of a different diameter, you should measure to be sure you are using the correct one.)
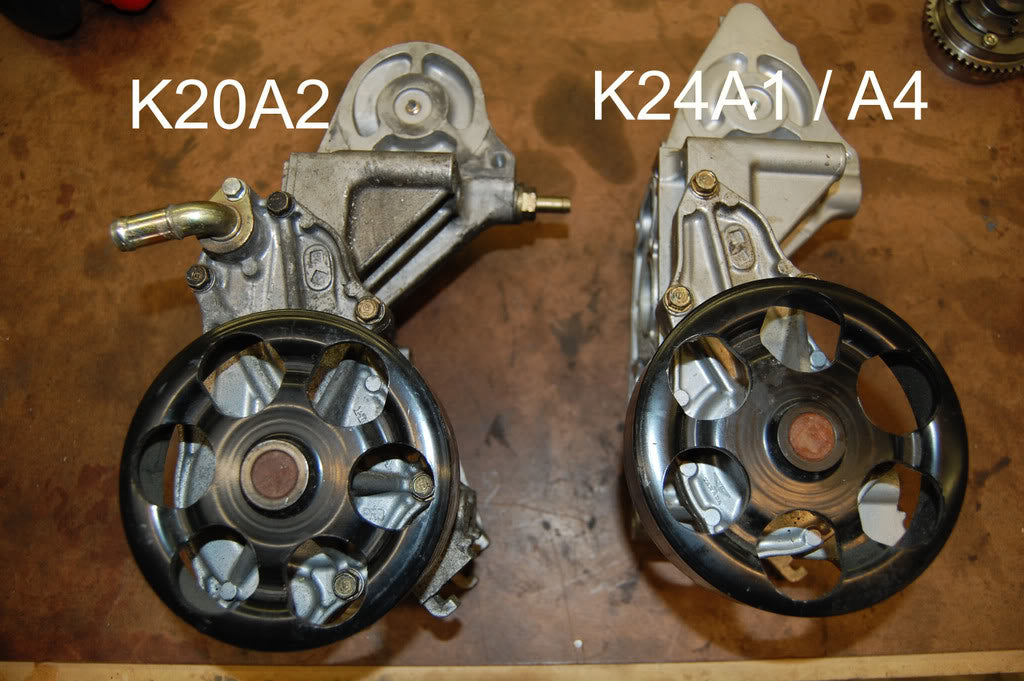
- Water pump (The K20A2 water pump contains an oil cooler, this will NOT fit on the K24 water pump housing. You must change the entire housing, not just the pump.)
- Oil Pan (Some are made from steel, some are made from aluminum. Depending on what pan you use, you may need to fabricate a transmission dust shield.)
- Head Bolts/Studs (we recommend using new ones)
Parts that ARE NOT interchangeable:
- Timing chain (The K20 chain are too short)
- Timing chain cover (The K20 cases are too short)
- Dipstick (It’s too short)
- K20 Head Gasket (You must use the K24 head gasket due to the increased bore)
You will also need a service manual for one of the K24 motors or K20A2 for all the torque specs.
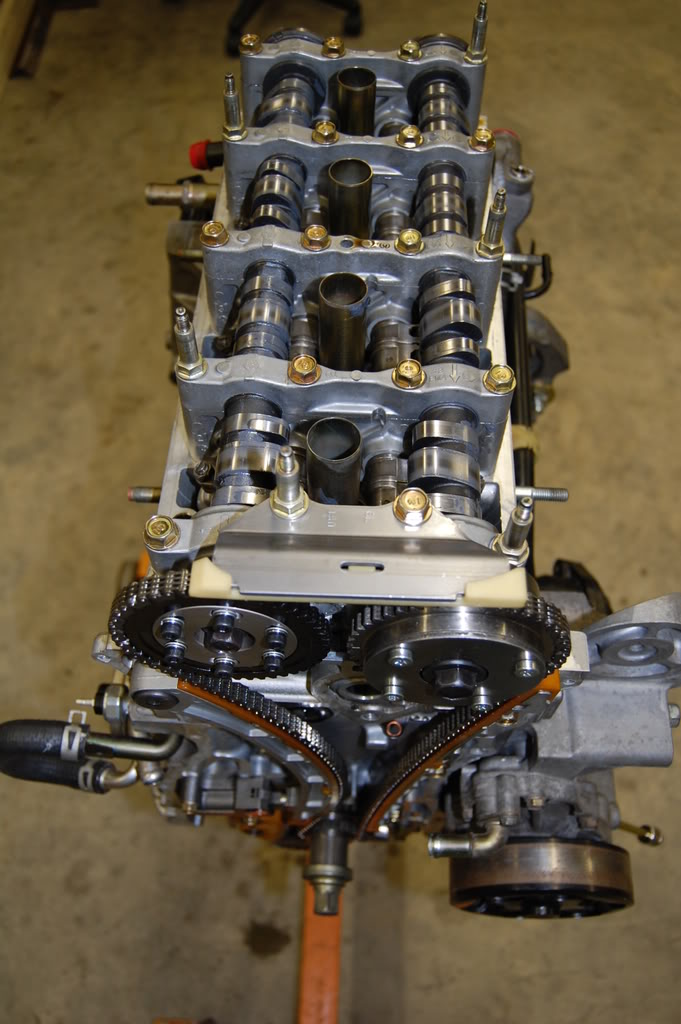
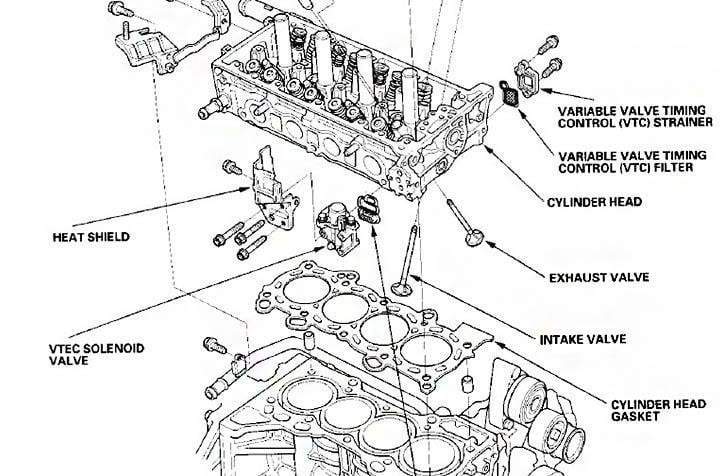
Start off by draining all fluids, removing the clutch and flywheel and bolt it to an engine stand. You can then start the disassembly , start by removing the accessories (i.e. AC compressor, Alternator) if you haven’t already. Refer to the illustration for the exploded view of the valve and timing chain covers; Remove these next.

After removal of the valve and timing chain covers (K20A2 pictured):
- Note: If using the K20 oil pan, you will need the longer oil pan 10mm bolts
- Note: For built – high revving engines, we recommend the use of an F20C oil pump. The F20C pump is not a bolt on part, modifications will be required. The K20A2 oil pump WILL cavitate past 8500rpm and the K20Z3 oil pump uses balance shafts that can reduce power output. Alternatively, we have seen ported PRB oil pumps maintain positive pressure up to 8800rpm.
- Note: If you plan to autocross, circuit, or drag race we recommend installing an oil pan baffle.
The K24 uses a pair of balance shafts in the oil pump and an abbreviated windage tray, that just adds extra weight to the setup so we will be using the K20A2 parts for this. If you chose to use the cast aluminum pan from the K20A2, remove the steel pan and pump now.
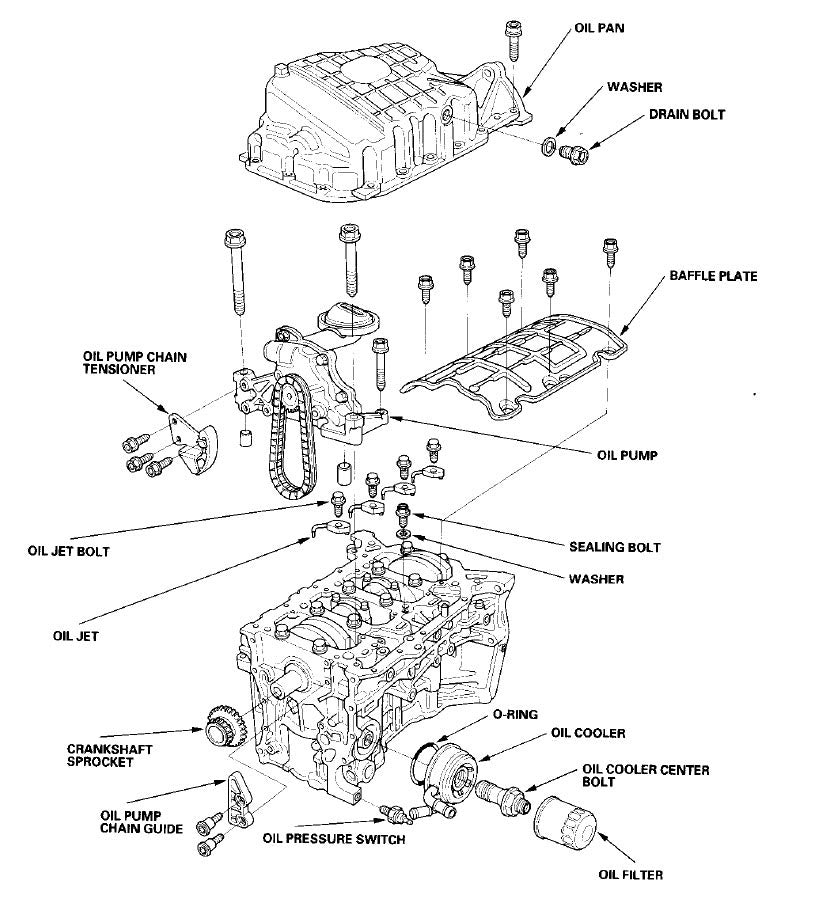
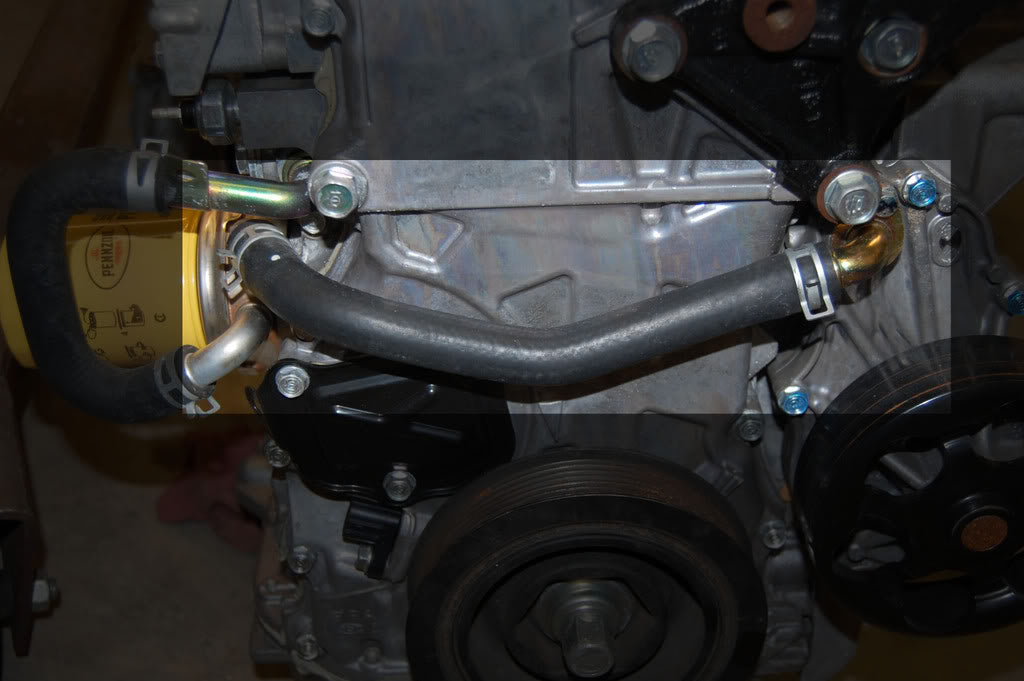
Once you have the block disassembled, a machine shop will be needed in order to drill a hole for the oil cooler. This is not necessary for operation, however, to keep engine oil temperatures down during sustained high revs, it is recommended. To run this setup you will also need a k20 water pump housing as it is different than the k24. The K20 water pump housing incorporates a coolant port for the oil cooler; The K24A1 / A4 engines do not have this.
- Note: When removing parts with Hondabond, clean the gasket off both parts to create a clean and flat surface and to ensure a leak-free seal.
- Note: Alternatively, you can run an external oil cooler instead of having the block drilled and tapped. In most cases, adding an external cooler with a sandwich plate is much easier and will offer better cooling for engines that will see high revs and high external ambient temperatures.


Once you have your bottom end prepped, you can begin to put the cylinder head on. Remember that you will need a K24 head gasket due to the 87mm bore size. We opted to use a Cometic K24 head gasket for our project. Instead of using the stock cylinder head bolts, we are installing Golden Eagle head studs for this engine. You may use the stock head bolts but before doing so you will need to measure them and make sure they are not out of spec. Measure the bolt in 4 different places along the threads and if any diameter is less than 10.6mm (0.42 in) replace the cylinder head bolt.
If using aftermarket head studs please follow their instructions carefully as they will most likely be different than the OEM. After the cylinder head is torqued, installation of the rocker arm assembly, cams, and caps are next. Use some type of engine assembly lube when installing the cams so there will be no damage to these parts upon initial startup.
Be sure to install the cam gear and VTC gear before installing the cam into the head.
- Intake VTC actuator gear bolt- 83 lbf.ft
- Exhaust Cam gear bolt – 51 lbf.ft


If using OEM head bolts, dip the threads in engine oil, then tighten them in sequence to 28ft.lb. Use a beam-type torque wrench. If using a preset type torque wrench, tighten slowly be sure not to over tighten. If any bolt makes a noise while turning, loosen fully and start from the first step.

After torquing down all of the head bolts, turn them in sequence, in two steps, 90*. (90* per step) If you are using new cylinder head bolts, turn one final additional step.

After the head is attached to the block you will need to move the cams and crank to top dead center.
1. Set the crankshaft to top dead center TDC. Align the TDC mark A on the crankshaft sprocket with the pointer B on the cylinder block.

2. Set the cams to TDC. The punch mark (A) marked with an arrow on the VTC actuator and the punch mark (B) on the exhaust cam sprocket should be at the top. Align the TDC marks (C) on the VTC actuator and exhaust cam sprocket.

Once the engine is set at TDC, it’s time to install the cam chain. Install the cam chain on the crank sprocket with the colored piece (A) aligned with the punch mark on the crank sprocket.

Next, install the timing chain on the VTC actuator and exhaust cam sprocket with the punch marks (A) aligned with the two colored pieces (B).

Now you can install the cam chain guide A (A) and the tensioner arm (B).

Once the guides are on install the auto-tensioner.

Install the cam chain guide B.

Then remove the pin from the auto tensioner.

Make sure to reinstall the camshaft position sensor sprocket.
- Face the sprocket accordingly, with the side labeled OUTSIDE… facing outside.
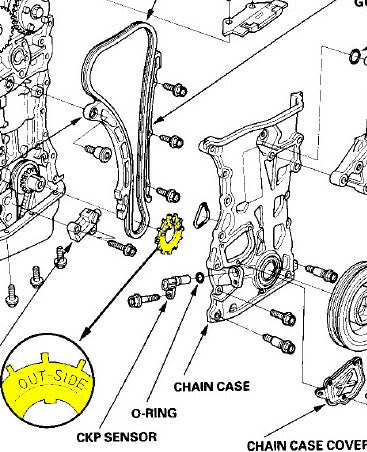
Now check the chain case oil seal for damage, replace if necessary. Remove old liquid gasket from the chain case mating surface, bolts and bolt holes. Clean and dry the chain case mating surfaces.
Apply Hondabond evenly to the cylinder block mating surface of the chain case and to the inner threads of the holes.

Apply Hondabond to the cylinder block upper surface areas (A) on the chain case.

The crank pulley can now be put on and torque to the proper specifications.
- Make sure to align the key and crank pulley when reinstalling.
- Torque crank pulley bolt to 181lbf.ft. DO NOT USE AN IMPACT WRENCH

Once the engine is back together, you can now begin to reinstall all of the other components (i.e. Intake manifold, water pump, alternator, engine wiring harness).
- Note: When installing the engine wiring harness, the Crank Position Sensor (CKPS) will not work with the K24. Be sure to get the K24 sensor and sensor plug. Make sure to wire the sensor the same way.
Be sure to check all fluid levels before running the engine. If the engine is brand new, follow all proper engine break-in procedures.
Please be sure to email us at info@hybrid-racing.com with any questions or concerns!
Can I use a k20z3 head ?
I have a 2005 acura rsx with a k20/k24 engine k20a2 head with a k24a2 base has a ktuner installed but i have a code of p0335
Thanks for your help
How about a k24z3 block pairing with k20 and making it awd? Am I crazy?
I am no sure where you’re getting your info, but great topic. I needs to spend some time learning much more or understanding more.
Thanks for wonderful information I was looking for this info for my mission.